Pre-Installation Preparation
Before embarking on the process of how to setup ASRock B650I Phantom Gaming WiFi motherboard, it is crucial to prepare adequately. This preparation phase plays a significant role in ensuring a smooth and efficient installation experience. First and foremost, checking the compatibility of the motherboard with your computer case is essential. The ASRock B650I is a mini-ITX motherboard, and it is vital to ascertain that your case is designed to accommodate such a form factor. Most modern cases will specify their compatibility with mini-ITX boards, but it is advisable to double-check the specifications to avoid any unforeseen complications.
In addition to ensuring compatibility, it is also important to gather the necessary tools for the installation process. A Phillips screwdriver is typically required for the mounting screws. If you plan on using an aftermarket CPU cooler, thermal paste will also be necessary. While many coolers come with pre-applied thermal paste, this may not be the case for all. It is prudent to have some quality thermal paste on hand to ensure appropriate heat transfer between your CPU and cooler.
Moreover, ensure that you are working in an environment that minimizes static electricity, which can damage sensitive components. An anti-static wrist strap can be beneficial, or simply grounding yourself by touching a metal part of your case can suffice. Organizing your workspace and having all tools and components readily available will facilitate an efficient assembly process when setting up the ASRock B650I Phantom Gaming WiFi motherboard. Taking these preparatory steps seriously not only enhances the installation experience but also helps in safeguarding your components from damage. Proper preparation ultimately contributes to a successful setup.
Table of Contents
Installation Steps
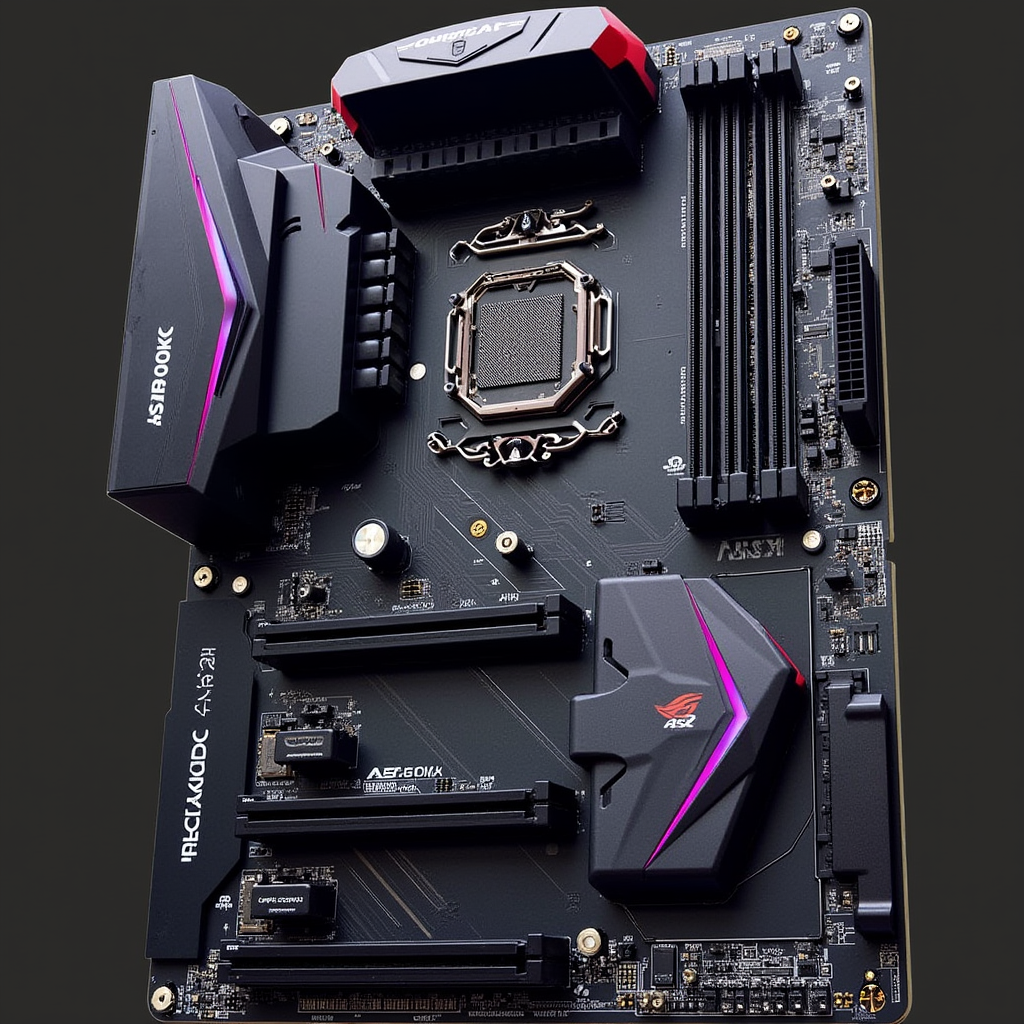
Installing components on the ASRock B650I Phantom Gaming WiFi motherboard is a meticulous process that requires attention to detail. Begin by preparing your workspace and ensuring that you have all necessary components on hand, including the CPU, cooler, RAM, power supply, storage devices, and WiFi antennas.
The first step is the installation of the CPU. Carefully open the CPU socket by lifting the lever on the side. Align the CPU with the socket; note the correct orientation, typically indicated by a small triangle on both the CPU and the socket. Gently place the CPU into the socket without applying any force, and then lower the lever to secure it in place.
Next, you will install the CPU cooler. Before attaching the cooler, it is vital to apply thermal paste to the CPU surface, which facilitates better heat transfer. A pea-sized amount in the center of the CPU is usually sufficient. After applying the thermal paste, position the cooler over the CPU and secure it according to the manufacturer’s instructions, ensuring a tight fit is achieved without over-tightening.
Following the CPU installation, proceed to install the RAM. Locate the RAM slots on the motherboard, usually adjacent to the CPU socket. Open the clips on each side of the desired RAM slot, align the RAM module with the notch in the slot, and press it down firmly until the clips click into place. It is advisable to consult the motherboard manual for recommended slots to use for enhanced performance.
After successfully installing the RAM, connect the power supply cables. The 24-pin power connector usually connects to the motherboard along with the CPU power connector, which is typically an 8-pin or 4-pin connector located near the CPU.
Next, install your storage devices. Depending on your preference for SSDs or HDDs, connect them to the appropriate SATA ports, which can facilitate faster data transfer speeds. Ensure all connections are secure.
Lastly, attach the WiFi antennas to the designated ports on the ASRock B650I motherboard, ensuring a strong wireless connection. Once all components are securely installed, you are ready to proceed with further configuration of the motherboard software.
Final Connections and Powering On
Once you have correctly installed the ASRock B650I Phantom Gaming WiFi motherboard, the next critical step is making the final connections before powering on your system. This involves connecting additional peripheral devices, which can include a graphics card, storage drives, and USB devices. Ensure your graphics card is securely seated in the appropriate PCIe slot, as documented in the motherboard manual, and connect any required power cables that may be necessary to enable its functionality.
Additionally, you will need to attach front panel connectors, such as the power switch, reset button, and LED indicators, which are usually found at the bottom of the motherboard. Refer to your case’s manual for the exact pin layout to avoid any incorrect connections. This will ensure that all your controls, including the power button, will function as intended once the system is powered on. It is essential to pay careful attention to these connections, as they are crucial for the proper operation of the motherboard and peripherals.
Furthermore, verify that all USB connections are plugged into the appropriate ports on the motherboard, including those for USB 2.0 and USB 3.0 devices. After all peripheral devices are connected, and front panel connectors are secured, it is advisable to perform a final check of all the connections. Double-check that your BIOS battery is inserted correctly and that RAM modules and any related components are tightly fastened to their respective slots. Ensure no cables are obstructing any fans or connectors. Completing this checklist can prevent common issues upon the first power-up. Once all connections are confirmed, you are ready to plug in the power supply and power on your computer for the first time.
BIOS Setup and Operating System Installation
Upon powering on your system for the first time with the ASRock B650I Phantom Gaming WiFi motherboard installed, the first task is to enter the BIOS setup. To do this, immediately press the Del key as soon as you see the ASRock logo on the screen. This action will take you into the BIOS interface, where various configurations can be adjusted to suit your preferences.
Once you are in the BIOS, it is essential to configure the boot priority settings. Navigate to the Boot menu, where you can select the primary boot device. For instance, if you plan to install your operating system from a USB flash drive, make sure it is prioritized over other devices like the hard drive or SSD. This ensures that your system will boot from the installation media when it restarts after the initial setup.
In addition to adjusting boot priority, you may also want to explore options within the Advanced or Performance settings. Here, users can enable features such as XMP profiles to optimize RAM performance, which is particularly beneficial for gaming or intensive applications. After making the necessary adjustments, be sure to save your changes and exit the BIOS, typically done by pressing the F10 key.
After exiting the BIOS, your system should boot from the selected installation media. Follow the onscreen instructions to initiate the operating system installation process. During this phase, you will be prompted to choose the appropriate storage device for your OS installation. It is crucial to select the correct SSD or hard drive, especially if your setup includes multiple drives. Make sure you format the desired drive correctly if necessary, allowing for a clean installation. Completing these steps will finalize the OS setup, allowing you to utilize your ASRock B650I Phantom Gaming WiFi motherboard effectively.